Minisforum MS-01 Work Station, initial bring-up
Table of Contents
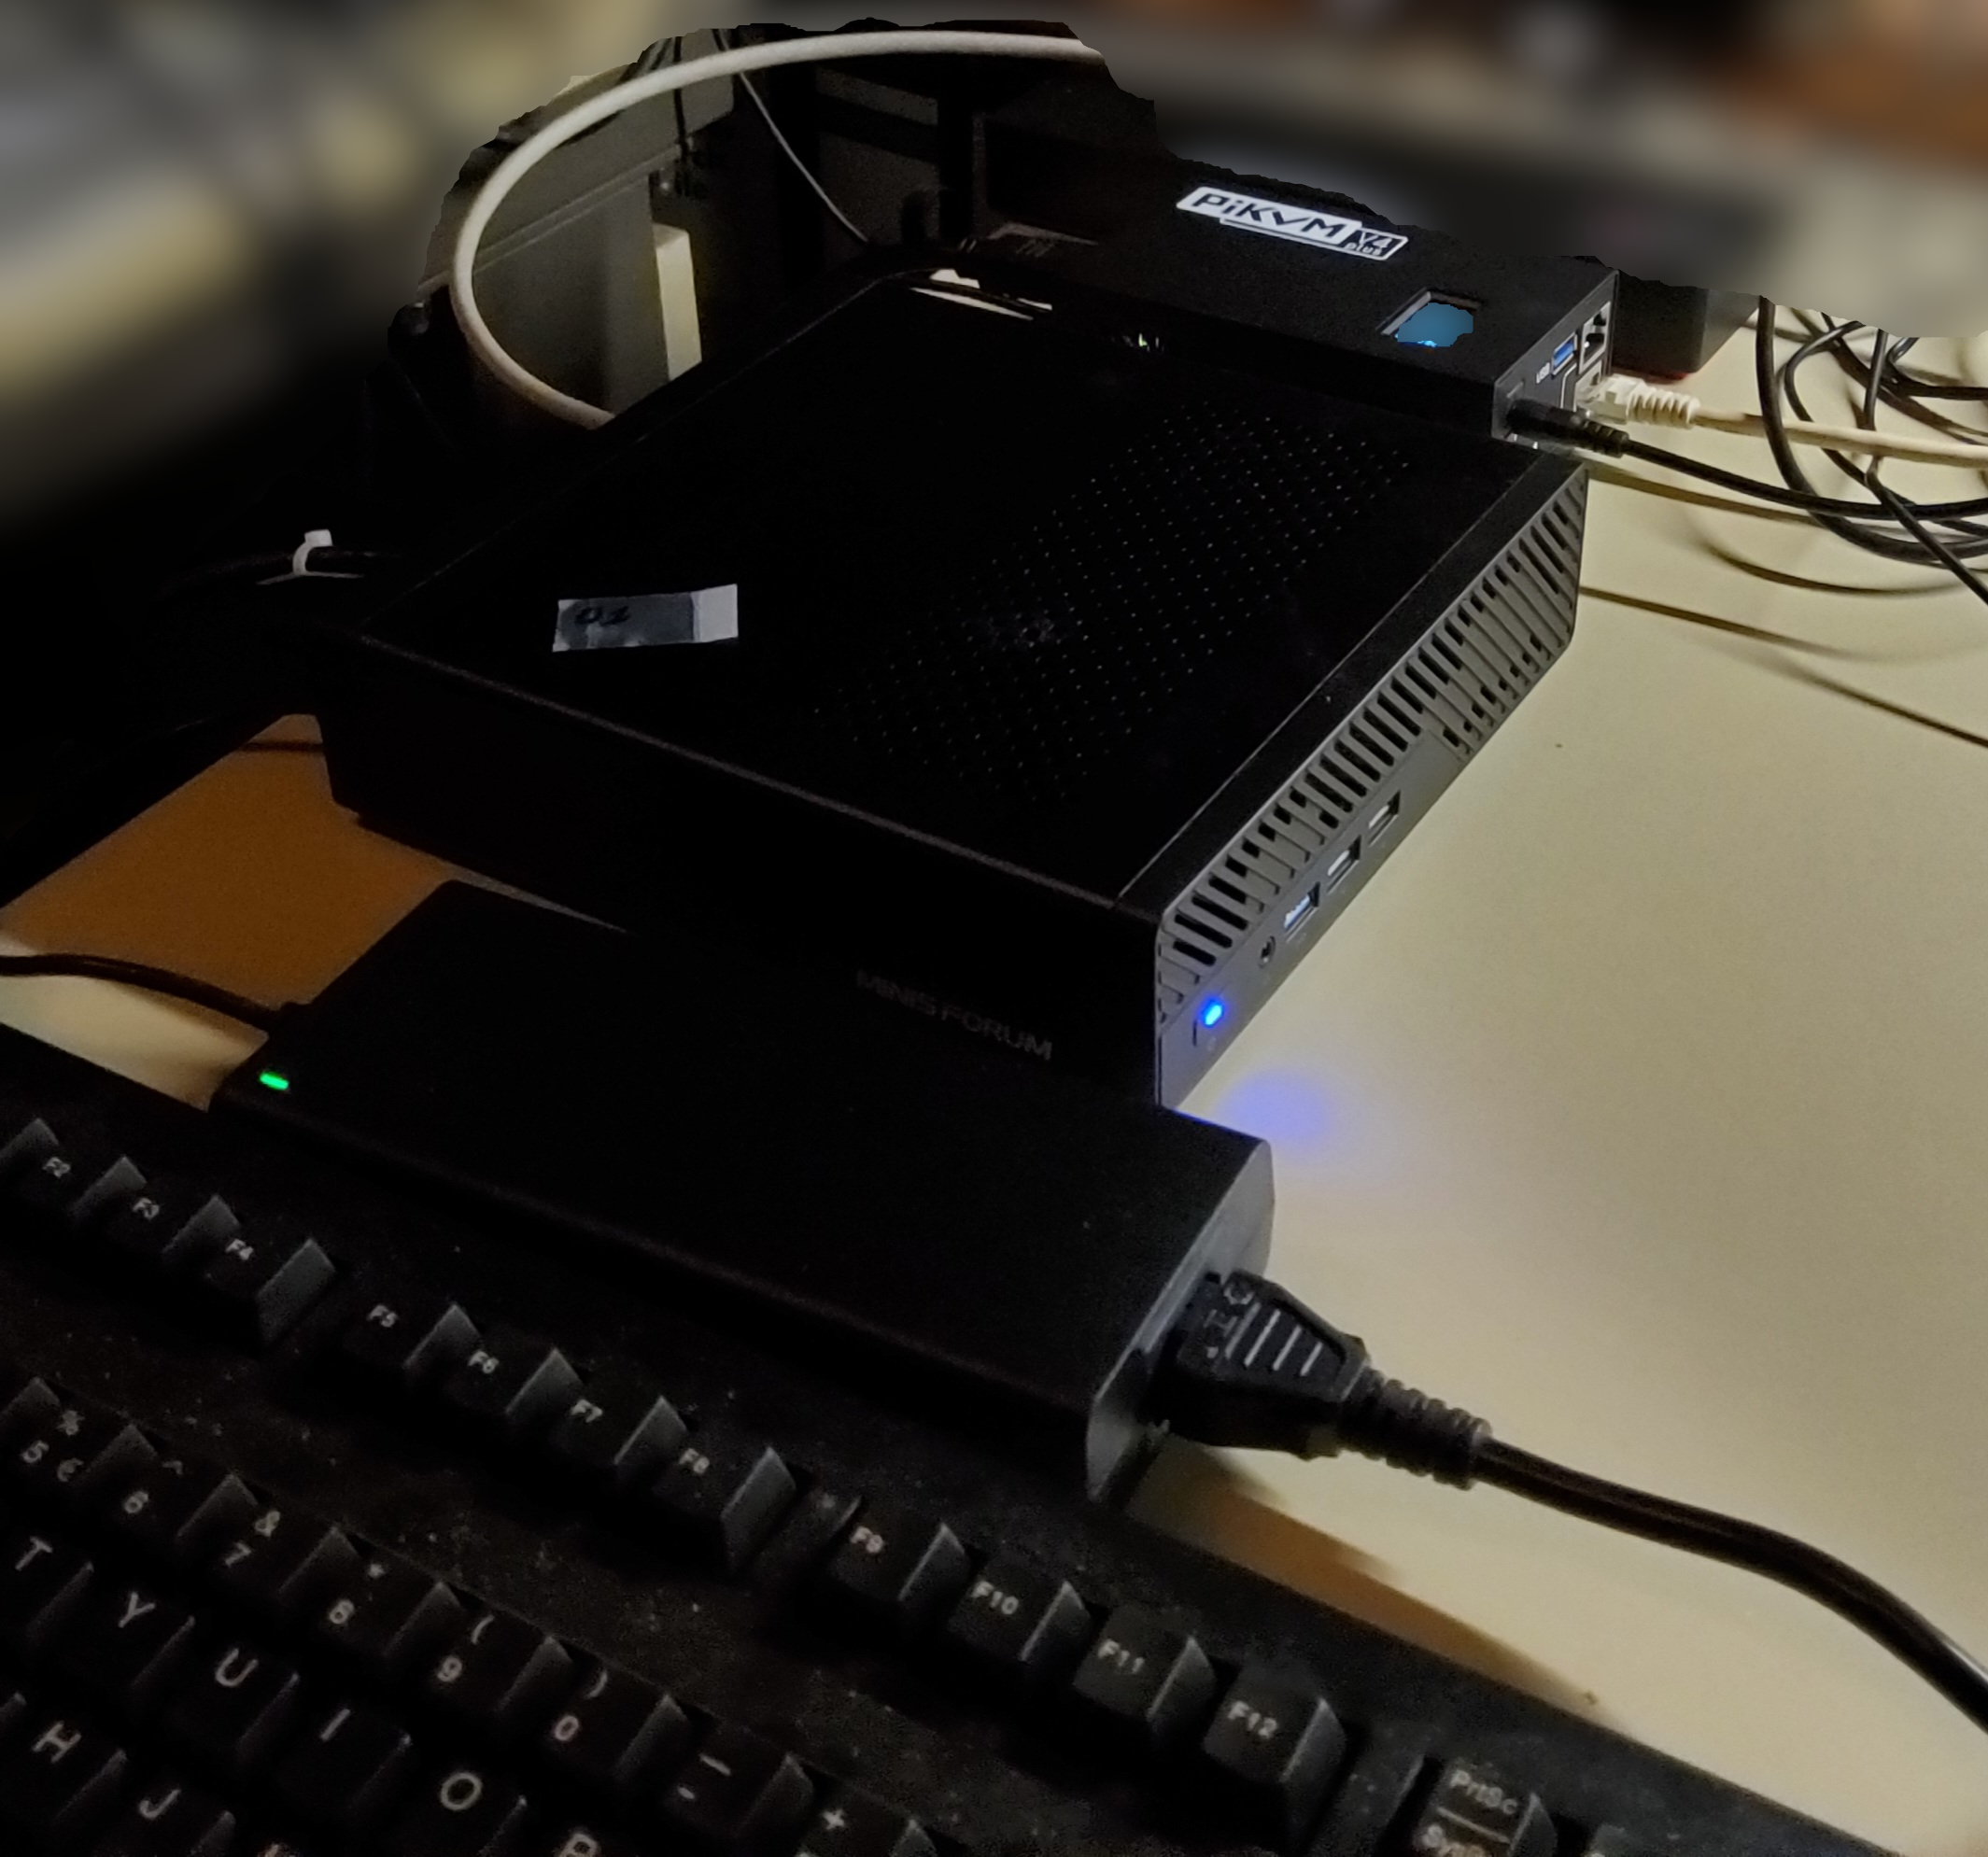
I purchased five Minisforum MS-01 Work Station, specifically the Intel Core i9-13900H / 32GB RAM + 1TB SSD bundle from their German store (simply because I live in Germany) to replace my ageing F5-422 Ceph nodes.
These are my notes on initial bring-up.
Introduction
I chose this Specific Model mainly because they come with SFP+, but also because they come with a modern CPU and are physically small. Also the ability to order from a European shop was a deciding factor.
I am fully aware that this is a H type mobile CPU and that the NVMe sockets are not all the same speed. But they will live in my homelab, which is the same rome as my home office. Besides cost, I also had to factor in noise and size.
Relevant Specifications for my Intended Use Case
Full specs can be found on this vendor page what follows are those bits of the specifications that made me pick the MS-01 over other models and vendors.
- 2 SFP+ network port
- 2 RJ-45 network port
- 3 slots for M.2 NVMe
- 1x M.2 2280 NVME SSD(Alt U.2)(PCIE4.0x4)
- 1x M.2 2280/22110 NVME SSD(PCIE3.0x4)
- 1x M.2 2280/22110 NVME SSD(PCIE3.0x2)
- 1x PCIe Slot (half height single slot, x16 physical, up to PCIe 4.0 x8)
- 2x SO-DIMM DDR5 slots
- Intel® Core™ i9-13900H
- 1.42 Kg
- 196 x 189 x 48 mm
Yes, all M.2 slots with 4 lanes would have been nicer. But this is affordable homelab hardware, not enterprise-y rackmount servers.
Homelab Network Preparation
- DNS entries in 3 networks
- dhcpd entries in 1 network
Planned Network Wiring
- wire 1x DAC to Ceph private_network VLAN
- Wire 1x RJ-45 to access network (left one, closest to SFP+ is the one where Intel AMT can be used)
- Wire 1x RJ-45 to Ceph public_network VLAN
The final wiring will happen only after I got vertical stands and have all 5 MS-01 on a shelf.
For initial bring-up, the nodes are one after another put on a table and installed.
For manipulating the UEFI firmware settings, I used my PiKVM V4 Plus.
Entering UEFI firmware settings (aka “BIOS” setup)
Quiet Boot enabled
After pressing the power button and the power LED lighting up, a HDMI connected screen will
- start with no signal
- then receives a signal but it is a black screen
- finally it displays the minisforum logo
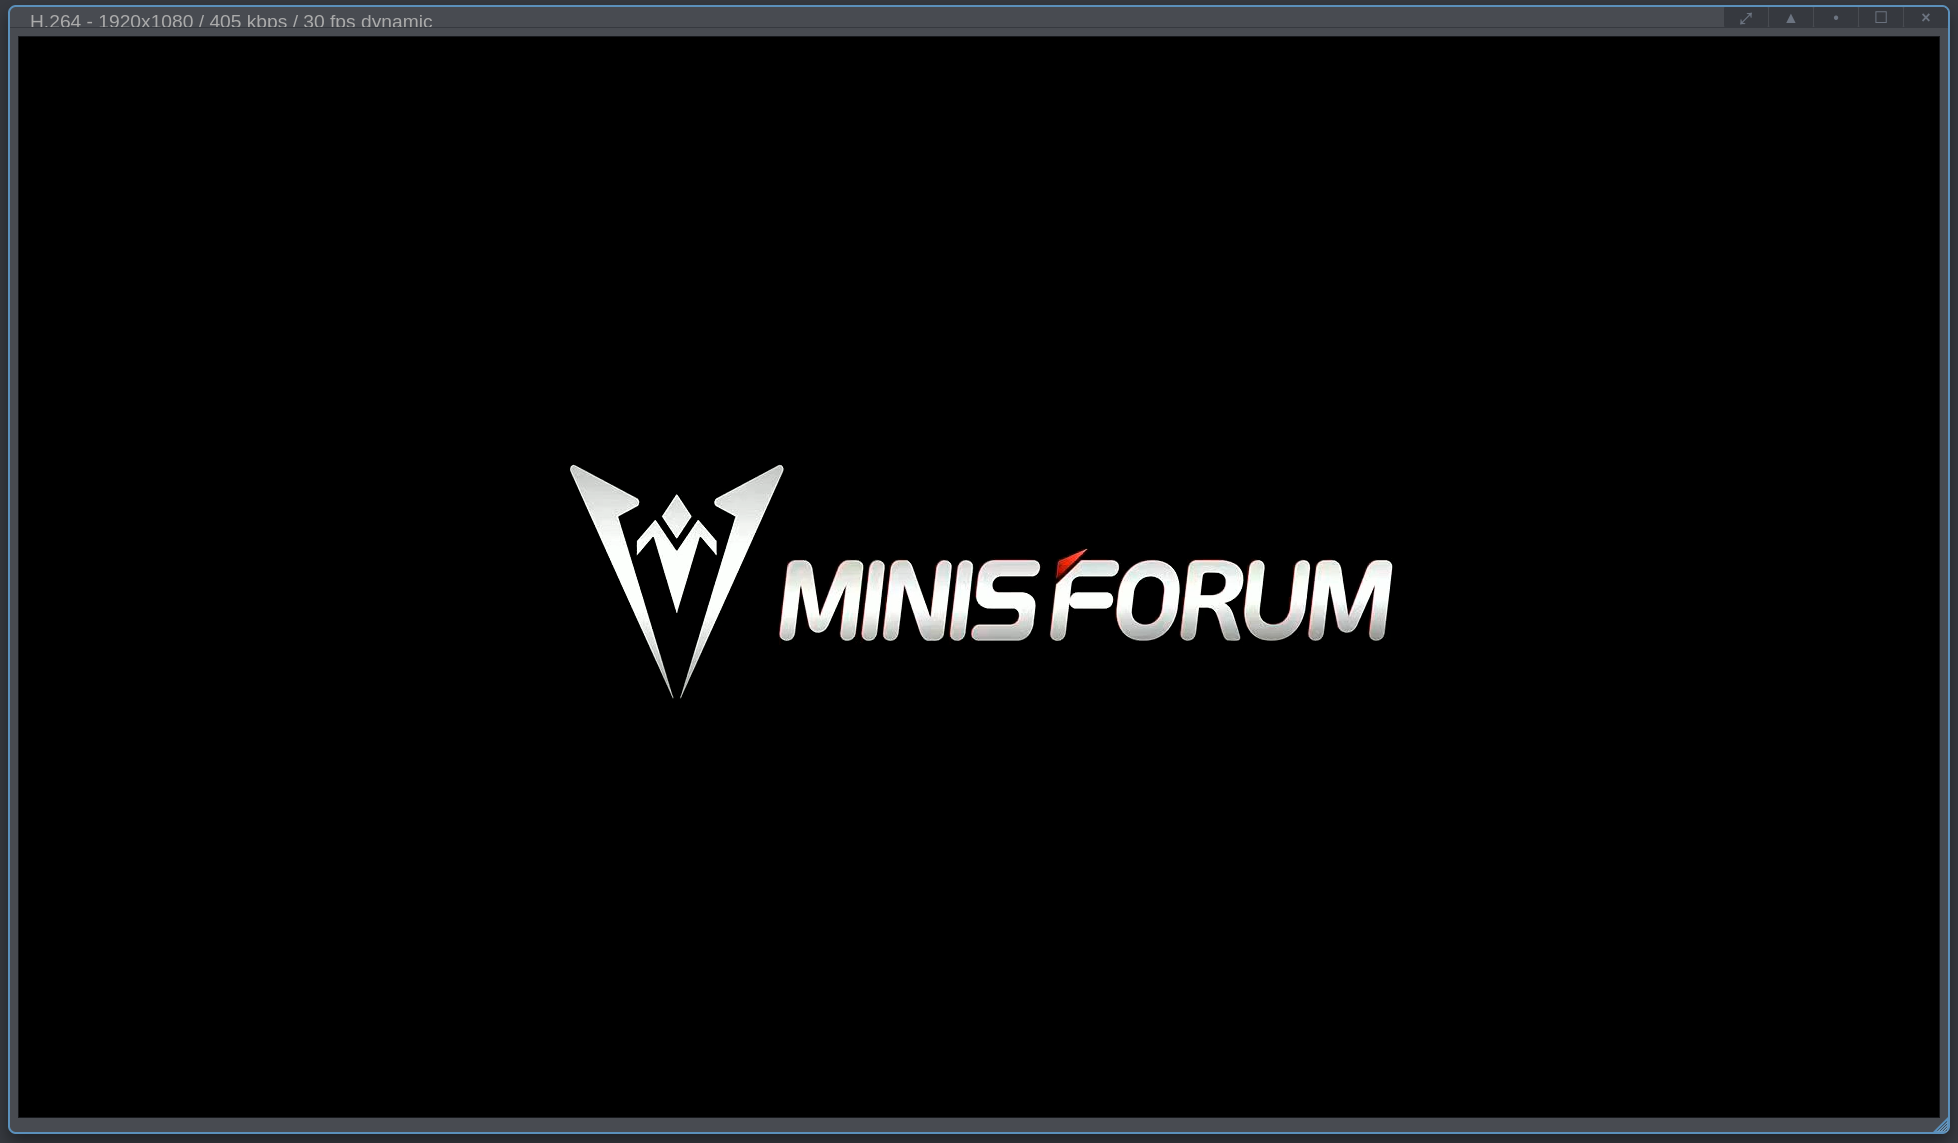
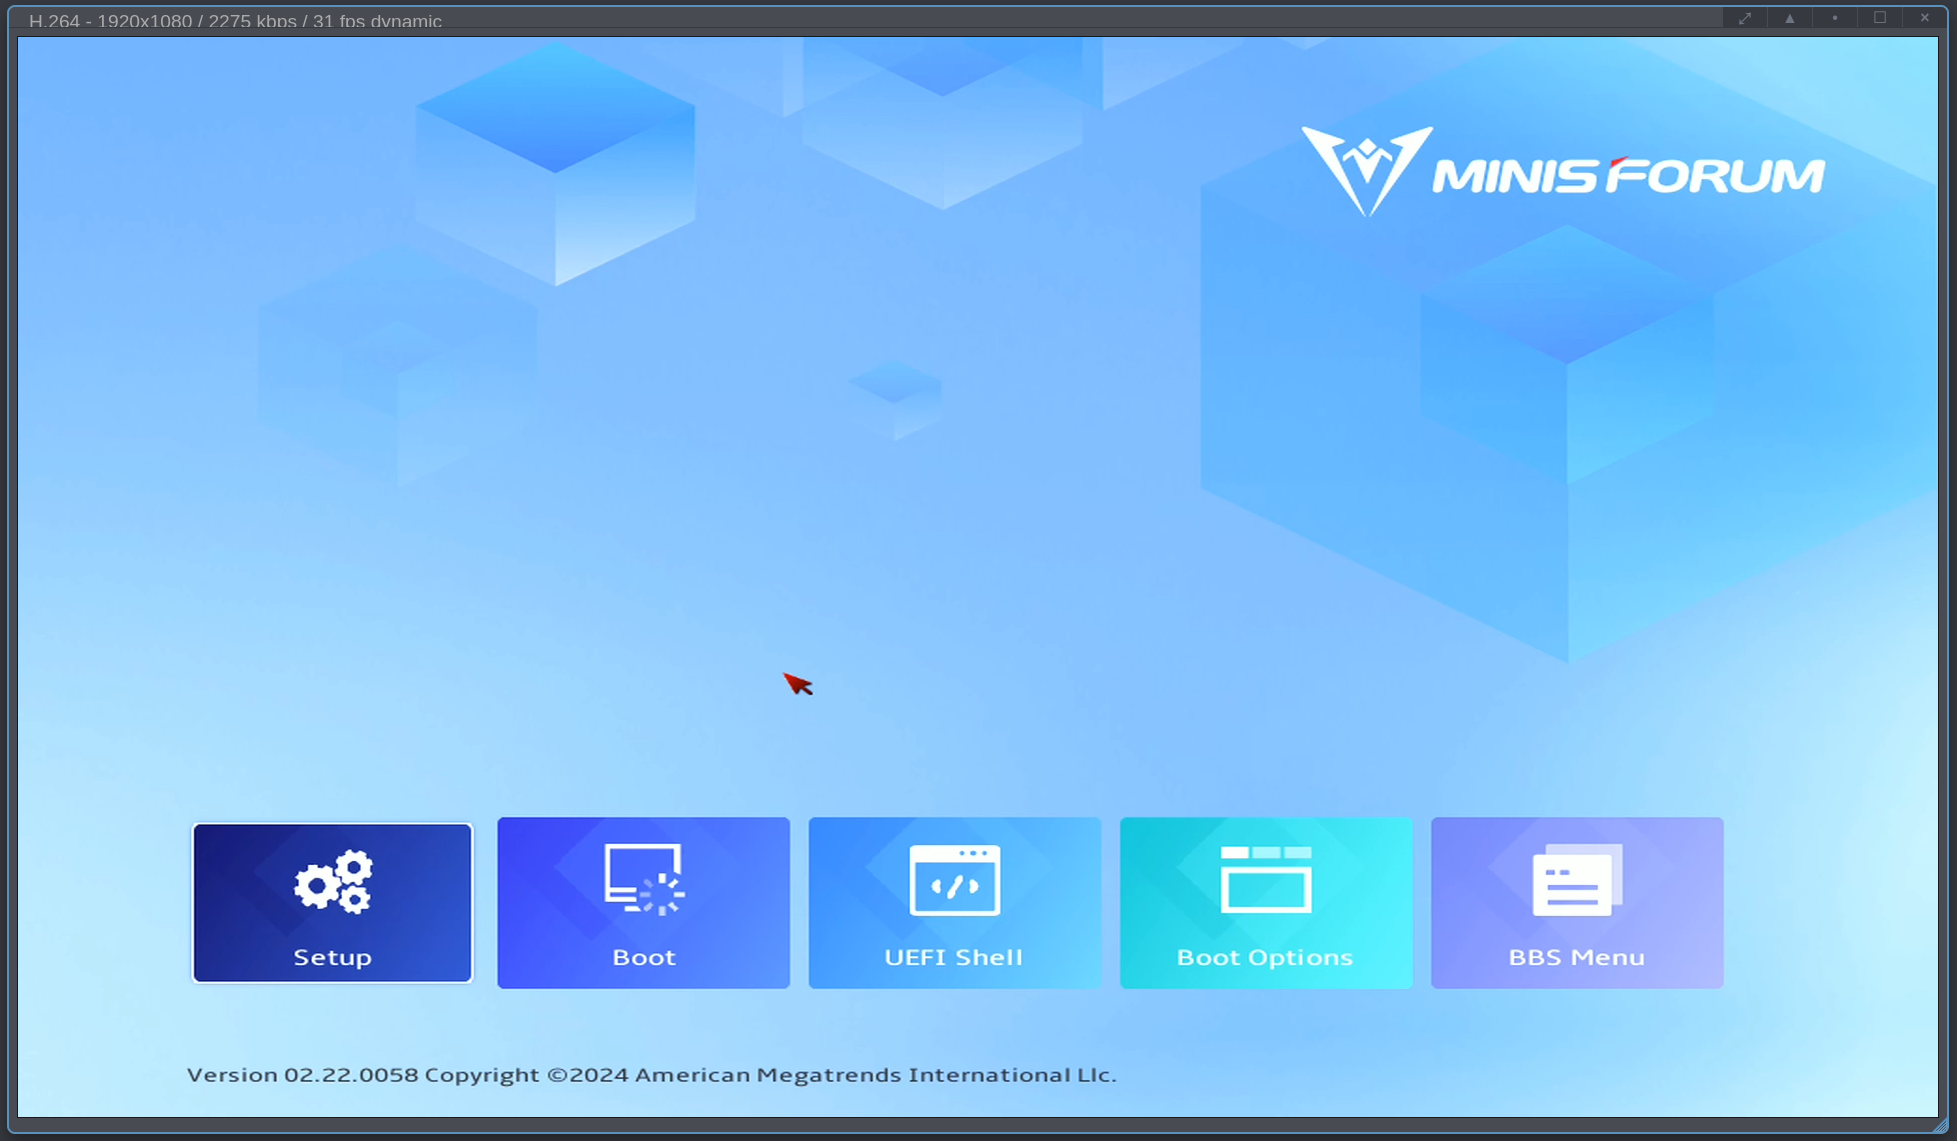
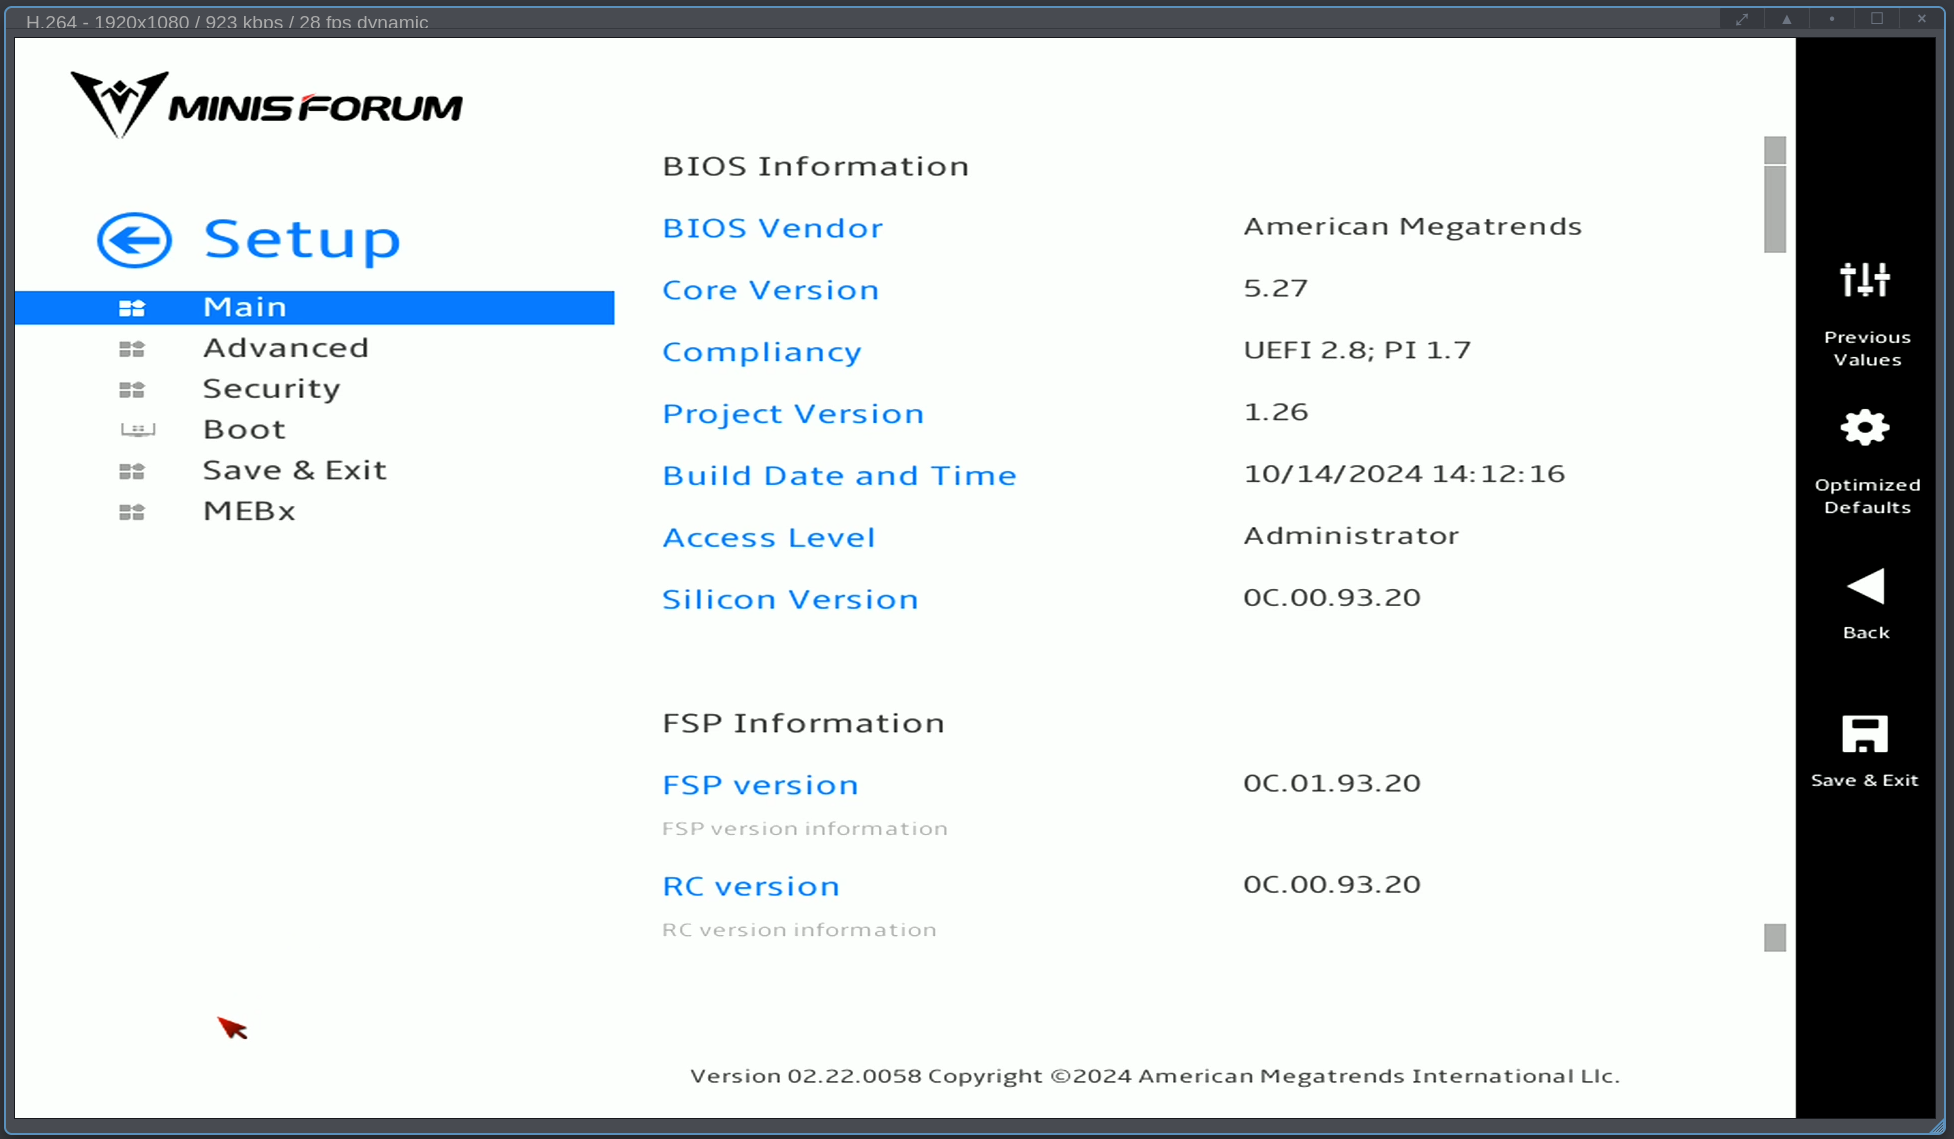
When this POST logo is displayed, hitting the Del key (once) reliably opens the below screen for me. You can override the boot source non-permanently via the entry BBS Menu (e.g to boot once from network), obviously firmware settings can be adjusted at the entry Setup.
Quiet Boot disabled
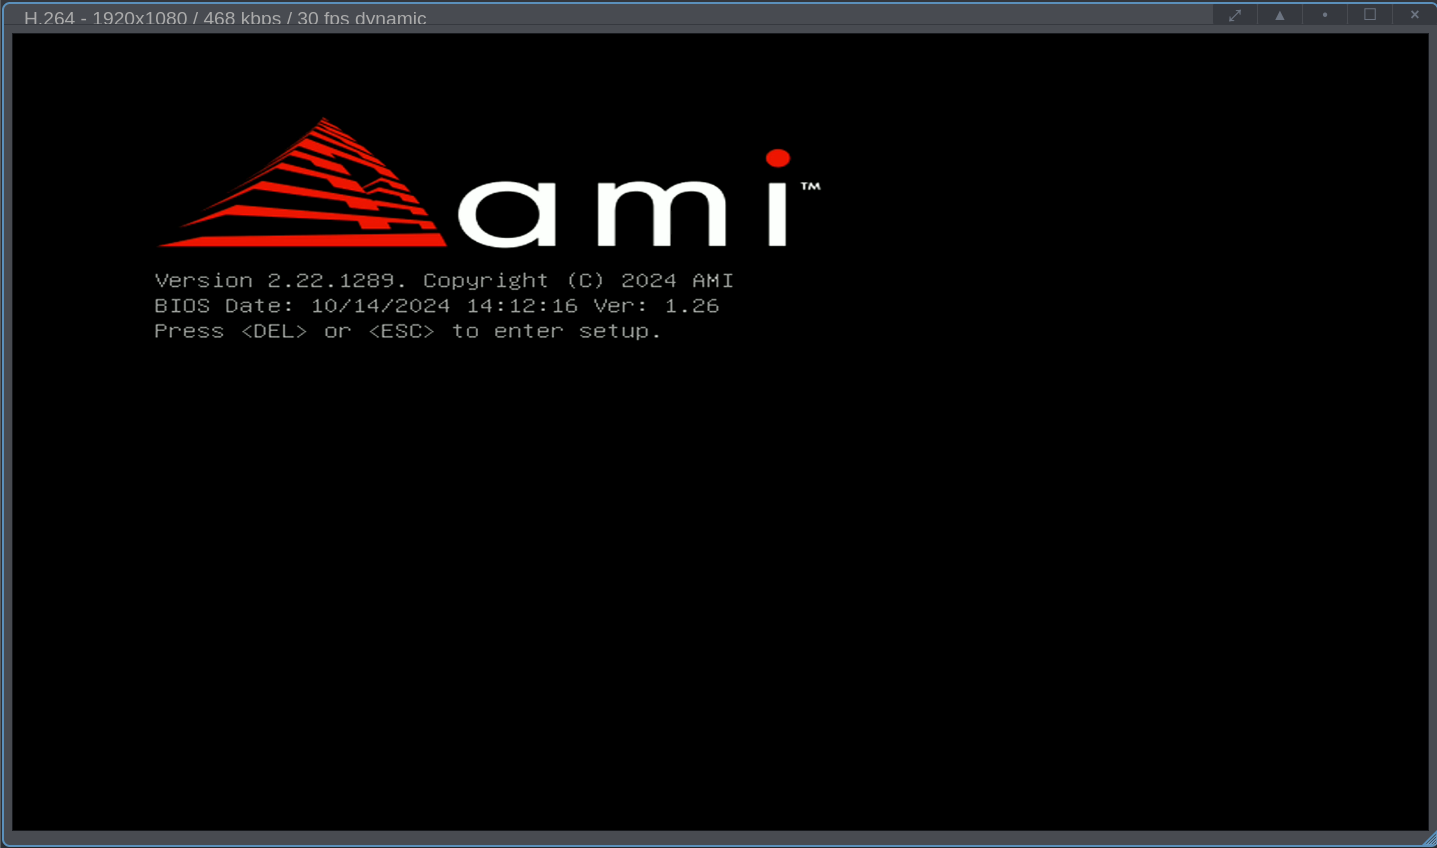
Alternatively, go to Setup / Boot / Quiet Boot and disable it to get a on screen display at POST.
Initial Bringup
Save vendor’s manual to my fileserver
The manual can be found at https://www.minisforum.com/new/support?lang=en#/support/page/download/108
Latest today is 2023-12-25 and it’s, errm how to say politely… more of a good Quick Start Guide than a full User Manual, it’s certainly no ThinkPad Hardware Maintenance Manual nor a Framework Laptop Guide, shame minisforum does not offer the level of detail these two offer.
For one, I was disappointed to not find a drawing on which one can see which M.2 slot is e.g. the 3.0 x2 one.
Update Firmware
Download Latest Version
Can be found at https://www.minisforum.com/new/support?lang=en#/support/page/download/108
On 2025-06-11 latest version was 1.27
Update to BIOS Version 1.27
Works in UEFI shell as per the vendor’s documentation (to be found in the BIOS zip file). No work around was needed (1.26 definitelyt did need work arounds to flash in UEFI shell).
On 2024-12-01 latest version was 1.26 and that was a bit more of a pain to flash, but that's in the past now. Click to expand if you care
old info: Prepare USB Stick for Updating MS-01 BIOS to 1.26
My five MS-01 are unable to find a UEFI shell, so I had to ensure one was present on the USB stick with the firmware update.
old info: Option A: Take Shell from older BIOS update file
- Download the most recent version (today that’s 1.26V BIOS) from minisforum’s MS-01 support page
- unzip the downloaded file
- Format a USB stick, GPT partition table, FAT32 filesystem (see example below)
- copy the content of the folder you got by unzipping (e.g. AHWSA.1.26_241014/) to the root of a FAT32 formatted USB stick
- if, but only if, that does not contain a folder EFI, then also download BIOS V1.22 (Factory BIOS) unzip BIOS V1.22 (Factory BIOS) and copy that ZIP’s EFI/ folder to the USB stick.
As you can see, 1.26 has no EFI/ directory.
pcfe@t3600 tmp $ unzip -l AHWSA.1.26_241014.zip
Archive:  AHWSA.1.26_241014.zip
  Length      Date    Time    Name
---------  ---------- -----   ----
        0  10-14-2024 14:52   AHWSA.1.26_241014/
       56  10-14-2024 14:57   AHWSA.1.26_241014/AfuEfiFlash.nsh
   629680  04-18-2023 11:16   AHWSA.1.26_241014/AfuEfix64.efi
      207  10-14-2024 14:57   AHWSA.1.26_241014/AfuWinFlash.bat
  1127536  10-18-2023 01:15   AHWSA.1.26_241014/AFUWINx64.exe
 33554432  10-14-2024 14:22   AHWSA.1.26_241014/AHWSA.1.26.bin
    36064  04-20-2023 17:20   AHWSA.1.26_241014/amigendrv64.sys
       44  10-14-2024 14:57   AHWSA.1.26_241014/EfiFlash.nsh
  1886624  07-25-2023 23:00   AHWSA.1.26_241014/Fpt.efi
  2444336  05-25-2023 12:32   AHWSA.1.26_241014/FPTW64.exe
     7398  10-14-2024 14:55   AHWSA.1.26_241014/Release_Note.txt
      203  10-14-2024 14:57   AHWSA.1.26_241014/WinFlash.bat
---------                     -------
 39686580                     12 files
1.22 does have an EFI/ directory which we can copy to the 1.26 stick.
pcfe@t3600 tmp $ unzip -l MS-01-AHWSA-BIOS-V1.22.zip
Archive:  MS-01-AHWSA-BIOS-V1.22.zip
  Length      Date    Time    Name
---------  ---------- -----   ----
        0  05-09-2024 15:24   MS-01-AHWSA-BIOS-V1.22/
      456  05-07-2024 09:42   MS-01-AHWSA-BIOS-V1.22/0-HOW TO FLASH.txt
       56  03-12-2024 14:23   MS-01-AHWSA-BIOS-V1.22/AfuEfiFlash.nsh
   629680  04-18-2023 11:16   MS-01-AHWSA-BIOS-V1.22/AfuEfix64.efi
      207  03-12-2024 14:23   MS-01-AHWSA-BIOS-V1.22/AfuWinFlash.bat
  1127536  10-18-2023 01:15   MS-01-AHWSA-BIOS-V1.22/AFUWINx64.exe
 33554432  03-12-2024 13:47   MS-01-AHWSA-BIOS-V1.22/AHWSA.1.22.bin
    36064  04-20-2023 17:20   MS-01-AHWSA-BIOS-V1.22/amigendrv64.sys
        0  05-07-2024 09:40   MS-01-AHWSA-BIOS-V1.22/EFI/
        0  05-07-2024 09:40   MS-01-AHWSA-BIOS-V1.22/EFI/BOOT/
   938880  07-10-2022 05:43   MS-01-AHWSA-BIOS-V1.22/EFI/BOOT/BOOTX64.efi
       44  03-12-2024 14:23   MS-01-AHWSA-BIOS-V1.22/EfiFlash.nsh
  1886624  07-25-2023 23:00   MS-01-AHWSA-BIOS-V1.22/Fpt.efi
  2444336  05-25-2023 12:32   MS-01-AHWSA-BIOS-V1.22/FPTW64.exe
      793  05-09-2024 15:26   MS-01-AHWSA-BIOS-V1.22/Release_Note.txt
      203  03-12-2024 14:23   MS-01-AHWSA-BIOS-V1.22/WinFlash.bat
---------                     -------
 40619311                     16 files
old info: Option B: Obtain an UEFI Shell from TianoCore
- Download the BIOS update ZIP from from minisforum’s support page
- Download an EFI Shell (I took mine from https://github.com/tianocore/edk2/). Huge thanks to this forum post
- Format a USB stick, GPT part table, FAT32 filesystem
- Extract the ZIP file from minisforum to the stick, no subfolder
- add the EFI shell as
shell.efi(all lowercase) to the stick, also in the root of the stick
old info: Example of Formatting a USB stick with GPT and FAT32
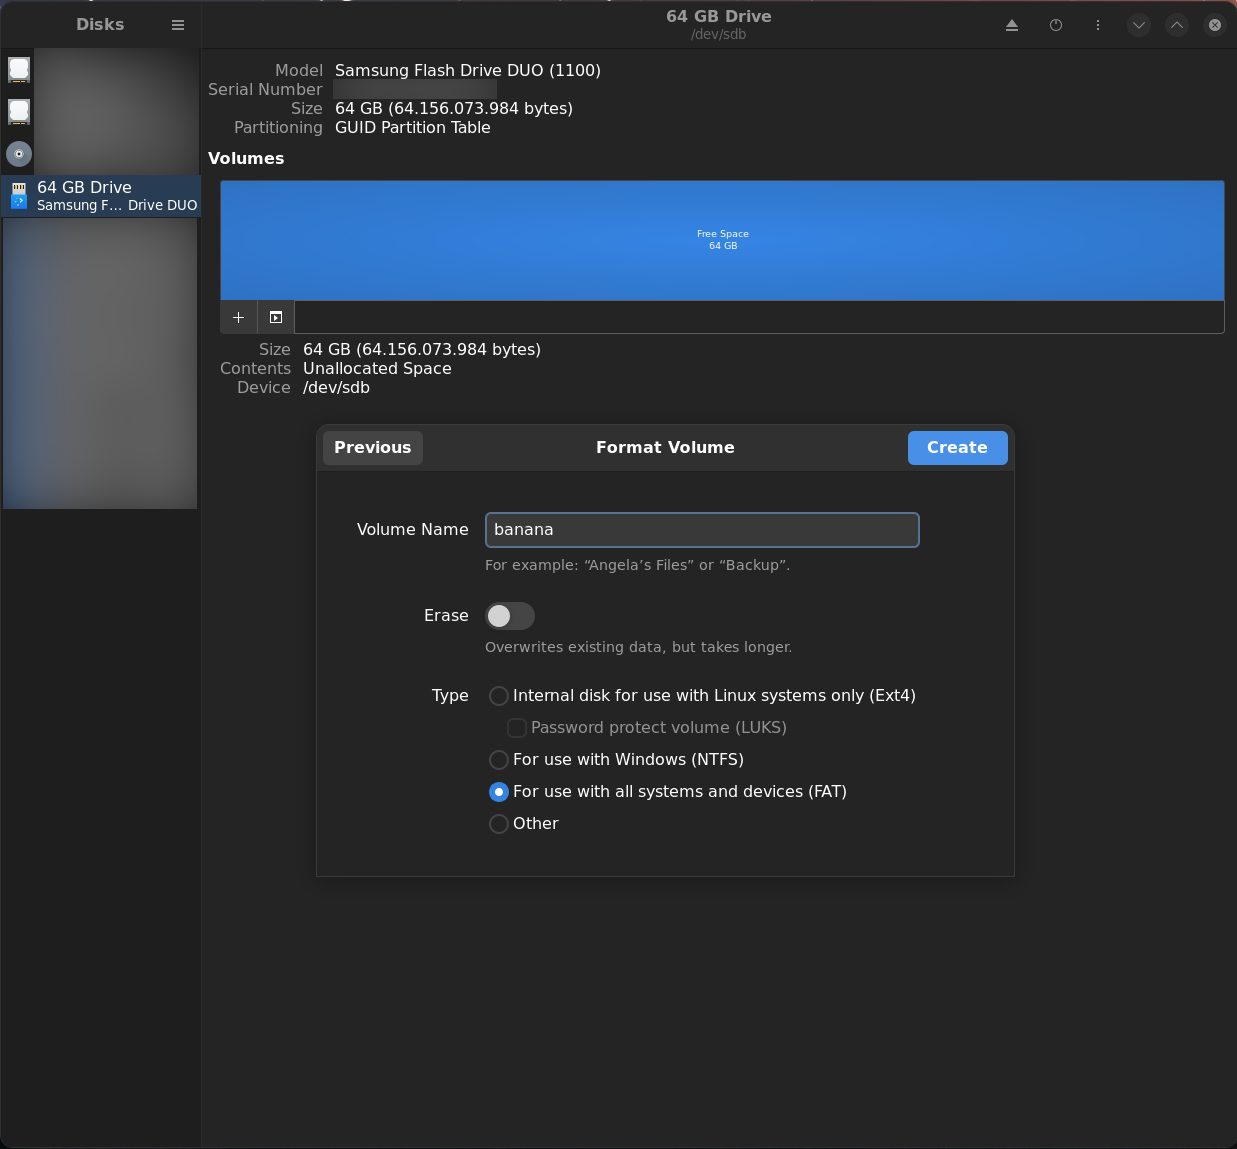
old info: Example of preparing the USB Stick for BIOS Update to 1.26
Unpack BIOS ZIP 1.26
pcfe@t3600 tmp $ unzip /net/fileserver/[…]/AHWSA.1.26_241014.zip
Archive:  /net/fileserver/[…]/AHWSA.1.26_241014.zip
   creating: AHWSA.1.26_241014/
 extracting: AHWSA.1.26_241014/AfuEfiFlash.nsh
  inflating: AHWSA.1.26_241014/AfuEfix64.efi
  inflating: AHWSA.1.26_241014/AfuWinFlash.bat
  inflating: AHWSA.1.26_241014/AFUWINx64.exe
  inflating: AHWSA.1.26_241014/AHWSA.1.26.bin
  inflating: AHWSA.1.26_241014/amigendrv64.sys
 extracting: AHWSA.1.26_241014/EfiFlash.nsh
  inflating: AHWSA.1.26_241014/Fpt.efi
  inflating: AHWSA.1.26_241014/FPTW64.exe
  inflating: AHWSA.1.26_241014/Release_Note.txt
  inflating: AHWSA.1.26_241014/WinFlash.bat
Since 1.26 does not include a UEFI Shell, also unpack 1.22
pcfe@t3600 tmp $ unzip /net/fileserver/[…]/MS-01-AHWSA-BIOS-V1.22.zip
Archive:  /net/fileserver/[…]/MS-01-AHWSA-BIOS-V1.22.zip
   creating: MS-01-AHWSA-BIOS-V1.22/
  inflating: MS-01-AHWSA-BIOS-V1.22/0-HOW TO FLASH.txt
 extracting: MS-01-AHWSA-BIOS-V1.22/AfuEfiFlash.nsh
  inflating: MS-01-AHWSA-BIOS-V1.22/AfuEfix64.efi
  inflating: MS-01-AHWSA-BIOS-V1.22/AfuWinFlash.bat
  inflating: MS-01-AHWSA-BIOS-V1.22/AFUWINx64.exe
  inflating: MS-01-AHWSA-BIOS-V1.22/AHWSA.1.22.bin
  inflating: MS-01-AHWSA-BIOS-V1.22/amigendrv64.sys
   creating: MS-01-AHWSA-BIOS-V1.22/EFI/
   creating: MS-01-AHWSA-BIOS-V1.22/EFI/BOOT/
  inflating: MS-01-AHWSA-BIOS-V1.22/EFI/BOOT/BOOTX64.efi
 extracting: MS-01-AHWSA-BIOS-V1.22/EfiFlash.nsh
  inflating: MS-01-AHWSA-BIOS-V1.22/Fpt.efi
  inflating: MS-01-AHWSA-BIOS-V1.22/FPTW64.exe
  inflating: MS-01-AHWSA-BIOS-V1.22/Release_Note.txt
  inflating: MS-01-AHWSA-BIOS-V1.22/WinFlash.bat
Copy the directory EFI/ from 1.22 to the folder where 1.26 was unpacked.
pcfe@t3600 tmp $ cp -r MS-01-AHWSA-BIOS-V1.22/EFI AHWSA.1.26_241014/
Copy content of the modified 1.26 directory to the root of the USB stick.
pcfe@t3600 tmp $ cp -r AHWSA.1.26_241014/* /run/media/pcfe/BANANA/
Your BIOS update Stick for 1.26 should now have the following structure.
pcfe@t3600 tmp $ tree /run/media/pcfe/BANANA/
/run/media/pcfe/BANANA/
├── AfuEfiFlash.nsh
├── AfuEfix64.efi
├── AfuWinFlash.bat
├── AFUWINx64.exe
├── AHWSA.1.26.bin
├── amigendrv64.sys
├── EFI
│   └── BOOT
│       └── BOOTX64.efi
├── EfiFlash.nsh
├── Fpt.efi
├── FPTW64.exe
├── Release_Note.txt
└── WinFlash.bat

3 directories, 12 files
old info: Update to BIOS Version 1.26
- cleanly unmount the USB stick you prepared following Option A or B
- insert the stick into the (powered off) MS-01
- power on MS-01
- enter the MS-01 firmware
- if not done yet, disable Secure Boot at Setup / Security / Secure Boot and reset. If you can not toggle Secure Boot status in Setup, do Save Changes and Reset then try again.
- in the BBS Menu, select the stick as boot source
- when it booted from the stick into the EFI shell, change to stick with
fs<number, probably 0 for you too>:, e.g.fs0:then runAfuEfiFlash.nsh - it will reboot when finished.
Firmware Settings I changed from Optimised Defaults
Hit Del, when you see the minisforum logo, to enter setup.
I loaded Optimised Defaults, then changed the following
MEBx (Intel ME)
- log in with the factory password admin
- you will be asked to set a strog password
- then I disabled Intel® AMT
For Intel ME, strong password means
- minimum 1 uppercase
- minimum 1 number
- minimum 1 special
- at least 8 characters
Advanced
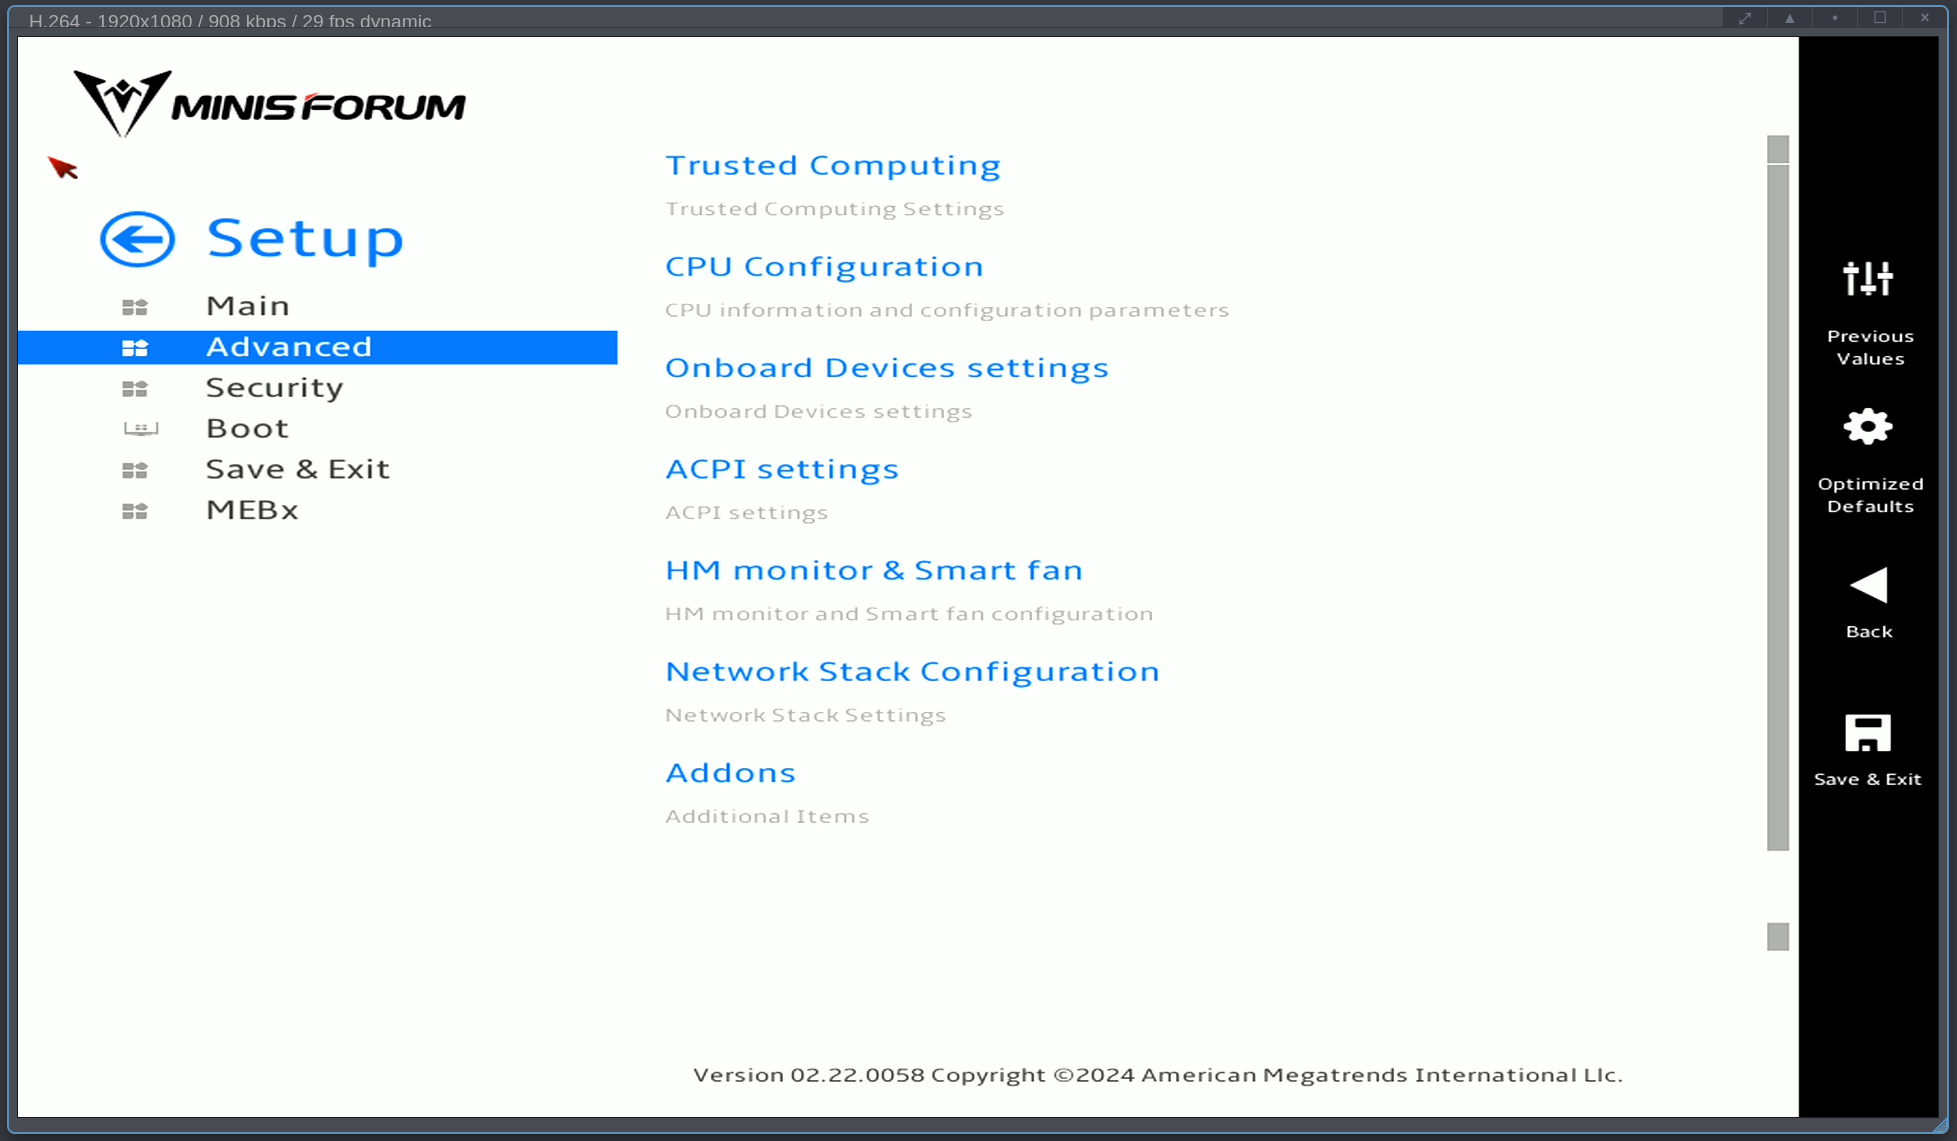
Advanced / CPU Configuration
- Boot performance mode Max Non-Turbo Performance
- Turbo Mode Disabled
Advanced / ACPI Settings
- Restore on AC Power Loss Last State
Advanced / Network Stack Configuration
- Network Stack Enabled
- IPv4 PXE Support enabled
Security / Secure Boot
To be enabled again after I did the firmware update and a PXE install.
Alternatively, put a signed by CentOS stream 9 grubx64.efi and shimx64.efi on my tftp server
to PXE boot with secboot enabled.
Operating System Will Go Onto the 1 TB NVMe
Because I bought the MS-01 in the bundle flavour, my initial install will be done without moving around the 1TB NVMe (it is pre-installed i the PCIe 4.0 x4 U.2 / M.2 slot) to see if the shipped bundle is not dead on arrival.
Later, move these to the PCIe 3.0 x2 slot, remember to adjust kickstart file for future re-installs, and put 2x 2TB NVMe for Ceph OSD use in the 2 faster slots.
Thoughs on overprovisioning the 1 TB NVMe
AFAIK, mucking about with spare area size
is not needed as long as fstrim.timer is enabled.
Additionally, I only partition about ⅕ of that NVMe (see kickstart file extract below).
Since the bundled 1TB NVMe had something on it (a Windows booted into an out-of-the-box Win), I dropped all blocks as per https://wiki.archlinux.org/title/Solid_state_drive/Memory_cell_clearing.
# nvme format /dev/nvme0 -s 0 -n 1
I went with a 200 GiB LVM Physical Volume (PV) plus the default sizes for /boot/ and /boot/efi/.
I simply have no need for more space, my current Ceph nodes have more than enough space on a 120GB (SATA) SSD.
Extract from my kickstart file
[…]
# Disk partitioning information
part /boot/efi --fstype="efi"   --ondisk=nvme0n1 --size=600 --fsoptions="umask=0077,shortname=winnt"
part /boot     --fstype="xfs"   --ondisk=nvme0n1 --size=1024
part pv.374    --fstype="lvmpv" --ondisk=nvme0n1 --size=204804
volgroup VG_OS --pesize=4096 pv.374
[…]
Gives me in the freshly installed operating system
[root@ms-01-01 ~]# vgs
  VG    #PV #LV #SN Attr   VSize   VFree
  VG_OS   1   7   0 wz--n- 200.00g 122.00g
[root@ms-01-01 ~]# pvs
  PV             VG    Fmt  Attr PSize   PFree
  /dev/nvme0n1p3 VG_OS lvm2 a--  200.00g 122.00g
[root@ms-01-01 ~]# lvs
  LV            VG    Attr       LSize  Pool Origin Data%  Meta%  Move Log Cpy%Sync Convert
  LV_containers VG_OS -wi-ao---- 10.00g
  LV_home       VG_OS -wi-ao----  1.00g
  LV_root       VG_OS -wi-ao----  4.00g
  LV_swap       VG_OS -wi-ao----  1.00g
  LV_var        VG_OS -wi-ao---- 12.00g
  LV_var_crash  VG_OS -wi-ao---- 40.00g
  LV_var_log    VG_OS -wi-ao---- 10.00g
[root@ms-01-01 ~]# df -h -x tmpfs -x devtmpfs
Filesystem                       Size  Used Avail Use% Mounted on
efivarfs                         192K  126K   62K  68% /sys/firmware/efi/efivars
/dev/mapper/VG_OS-LV_root        4.0G  1.8G  2.2G  46% /
/dev/nvme0n1p2                   960M  312M  649M  33% /boot
/dev/mapper/VG_OS-LV_home        960M   40M  921M   5% /home
/dev/mapper/VG_OS-LV_var          12G  259M   12G   3% /var
/dev/mapper/VG_OS-LV_var_log      10G  115M  9.9G   2% /var/log
/dev/mapper/VG_OS-LV_containers   10G  104M  9.9G   2% /var/lib/containers
/dev/mapper/VG_OS-LV_var_crash    40G  318M   40G   1% /var/crash
/dev/nvme0n1p1                   599M  7.5M  592M   2% /boot/efi
[root@ms-01-01 ~]#
Install CentOS Stream 9
Installing CentOS Stream 9 (both interactively and also via kickstart) was hassle free, as always.
Click to see the kickstart file I used.
#version=RHEL9

# reboot after installation is complete?
reboot

# Use graphical install
graphical

# enable kdump, there's a 40 GiB LV for /var/crash
%addon com_redhat_kdump --enable --reserve-mb='auto'
%end

# Keyboard layouts
keyboard --xlayouts='us'

# System language
lang en_US.UTF-8 --addsupport=de_DE.UTF-8,de_LU.UTF-8,en_DK.UTF-8,en_GB.UTF-8,en_IE.UTF-8,fr_FR.UTF-8,fr_LU.UTF-8

# Network information all switch ports have the respective VLAN as native
# WiFi
network  --bootproto=dhcp --device=wlp89s0 --onboot=off --ipv6=auto  --no-activate
# 2.5 GbE close to Thunderbolt ports (will go on 'storage' via ansible)
network  --bootproto=dhcp --device=enp87s0 --onboot=off --ipv6=auto --no-activate
# 2.5 GbE close to SFP+ ('access' network)
network  --bootproto=dhcp --device=enp88s0 --ipv6=auto --activate
# SFP+ port left, near case edge (will go on 'ceph' via ansible)
network  --bootproto=dhcp --device=enp2s0f0 --onboot=off --ipv6=auto  --no-activate
# SFP+ port righ, near 2.5 GbE ports
network  --bootproto=dhcp --device=enp2s0f1 --onboot=off --ipv6=auto  --no-activate

# Use network installation
url --url="http://fileserver.internal.pcfe.net/ftp/distributions/CentOS/9-stream/DVD/x86_64"
# The AppStream repo
repo --name="AppStream" --baseurl=http://fileserver.internal.pcfe.net/ftp/distributions/CentOS/9-stream/DVD/x86_64/AppStream

%packages
@^server-product-environment
%end

# Run the Setup Agent on first boot?
firstboot --disable

###
### adjust from nvme0n1 to whatever the PCIe 3.0 2x slot is
### the 2 fast slots 3.0 x4 and 4.0 x4) will be used for OSDs
###
# Generated using Blivet version 3.6.0
ignoredisk --only-use=nvme0n1
# Partition clearing information
clearpart --all --initlabel --drives=nvme0n1

# Disk partitioning information
part /boot/efi --fstype="efi"   --ondisk=nvme0n1 --size=600 --fsoptions="umask=0077,shortname=winnt"
part /boot     --fstype="xfs"   --ondisk=nvme0n1 --size=1024
part pv.374    --fstype="lvmpv" --ondisk=nvme0n1 --size=204804
volgroup VG_OS --pesize=4096 pv.374
logvol swap                --fstype="swap" --size=1024  --name=LV_swap       --vgname=VG_OS
logvol /var/lib/containers --fstype="xfs"  --size=10240 --name=LV_containers --vgname=VG_OS
logvol /var/log            --fstype="xfs"  --size=10240 --name=LV_var_log    --vgname=VG_OS
logvol /home               --fstype="xfs"  --size=1024  --name=LV_home       --vgname=VG_OS
logvol /var                --fstype="xfs"  --size=12288 --name=LV_var        --vgname=VG_OS
logvol /var/crash          --fstype="xfs"  --size=40960 --name=LV_var_crash  --vgname=VG_OS
logvol /                   --fstype="xfs"  --size=4096  --name=LV_root       --vgname=VG_OS

timesource --ntp-server=epyc.internal.pcfe.net
timesource --ntp-server=edgerouter-6p.internal.pcfe.net
# System timezone
timezone Europe/Berlin --utc

# Root password
rootpw --iscrypted [REDACTED]

# Ansible user, no password and locked
user --uid=942 --gid=942 --name=ansible --lock --gecos="Ansible User"

%post --log=/root/ks-post.log
# dump pcfe's ssh key to the root user
# obviously change this to your own pubkey unless you want to grant me root access
mkdir /root/.ssh
chown root.root /root/.ssh
chmod 700 /root/.ssh
cat <<EOF >>/root/.ssh/authorized_keys
[REDACTED]
EOF
chown root.root /root/.ssh/authorized_keys
chmod 600 /root/.ssh/authorized_keys
restorecon /root/.ssh/authorized_keys

# dump pcfe's Ansible ssh pubkey to the ansible user
mkdir /home/ansible/.ssh
cat <<EOF >/home/ansible/.ssh/authorized_keys
[REDACTED]
EOF
chown -R ansible.ansible /home/ansible/.ssh
chmod 700 /home/ansible/.ssh
chmod 600 /home/ansible/.ssh/authorized_keys
restorecon -R /home/ansible/.ssh

# allow ansible to use passwordless sudo
cat <<EOF >/etc/sudoers.d/ansible
ansible ALL=NOPASSWD:   ALL
EOF
chmod 644 /etc/sudoers.d/ansible

# Since Ceph and EPEL should not be mixed,
# pull check-mk-agent from my monitoring server (checkmk Raw edition)
dnf -y install http://check-mk.internal.pcfe.net/HouseNet/check_mk/agents/check-mk-agent-2.1.0p44-1.noarch.rpm
echo "check-mk-agent installed from monitoring server" >> /etc/motd

grubby --update-kernel=ALL --args="consoleblank=0" --remove-args="rhgb"
echo "removed graphical boot via grubby" >> /etc/motd
echo "suppress console blanking via grubby" >> /etc/motd

echo "kickstarted at `date` for CentOS Stream 9 and containerised Ceph on minisforum MS-01" >> /etc/motd

%end
Update Non-Volatile Memory on the 10G Network Adapters
I did this under Linux.
Obtain the latest firmware update using the Non-Volatile Memory (NVM) Update Utility for Intel® Ethernet Network Adapter 700 Series. Thanks to Fazio for this post
then
unzip 700Series_NVMUpdatePackage_v9_52_.zip
tar xvf 700Series_NVMUpdatePackage_v9_52_Linux.tar.gz
less 700Series/Linux_x64/readme.txt
I then copied (scp -r […]) the directory 700Series to each node and ran the update.
[root@ms-01-05 Linux_x64]# ./nvmupdate64e

Intel(R) Ethernet NVM Update Tool
NVMUpdate version 1.42.8.0
Copyright(C) 2013 - 2024 Intel Corporation.


WARNING: To avoid damage to your device, do not stop the update or reboot or power off the system during this update.
Inventory in progress. Please wait [***.......]


Num Description                          Ver.(hex)  DevId S:B    Status
=== ================================== ============ ===== ====== ==============
01) Intel(R) Ethernet Converged         9.32(9.20)   1572 00:002 Update
    Network Adapter X710                                         available
02) Intel(R) Ethernet Controller          N/A(N/A)   125C 00:087 Update not
    I226-V                                                       available
03) Intel(R) Ethernet Controller          N/A(N/A)   125B 00:088 Update not
    I226-LM                                                      available

Options: Adapter Index List (comma-separated), [A]ll, e[X]it
Enter selection: 01
Would you like to back up the NVM images? [Y]es/[N]o: y
Update in progress. This operation may take several minutes.
[.....-****]


Num Description                          Ver.(hex)  DevId S:B    Status
=== ================================== ============ ===== ====== ==============
01) Intel(R) Ethernet Converged         9.80(9.50)   1572 00:002 Update
    Network Adapter X710                                         successful
02) Intel(R) Ethernet Controller          N/A(N/A)   125C 00:087 Update not
    I226-V                                                       available
03) Intel(R) Ethernet Controller          N/A(N/A)   125B 00:088 Update not
    I226-LM                                                      available

A reboot is required to complete the update process.

Tool execution completed with the following status: All operations completed successfully.
Press any key to exit.
Identify the NVMe Slot Speeds
https://store.minisforum.de/en/blogs/blogartikels/ms-01-work-station has a picture (that would have been great in the User Manual).
From left to right, where left is the slot closest to the U.2 | M.2 power toggle switch and right is closest to the WiFi/BT M.2 card
- PCIe 4.0 x4 2280 (can also be U.2, remember to set the power selector switch to the correct position!)
- PCIe 3.0 x4 2280 / 22110
- PCIe 3.0 x2 2280 / 22110
Additional Purchases
10 Gig DACs
5x Direct Attach Cable (DAC), 3m from fs.com. The price is IMO fair, they also ship from Germany and their DAC cables already serve me well for other hosts connected to my 10 GbE switch.
10 NVMe for Ceph OSD Usage
In each MS-01, the two fastest M.2 slots will be for Ceph OSD usage, the 3rd slot will house the included (in the 32 GiB RAM + 1 TB NVMe bundle) NVMe which I will move from the PCIe 4.0 x4 to the PCIE3.0x2 M.2 simply because all I do with that NVMe is booting, starting a couple containers and writing logs.
Reminder, for initial bringup I left the bundle as is, I wanted to first ensure that none were dead on arrival and do that in the factory configuration. Now that thay all passed that smoke test, I next need to do the move of the 1TB and the addition of 2x 2TB, but that will not happen today.
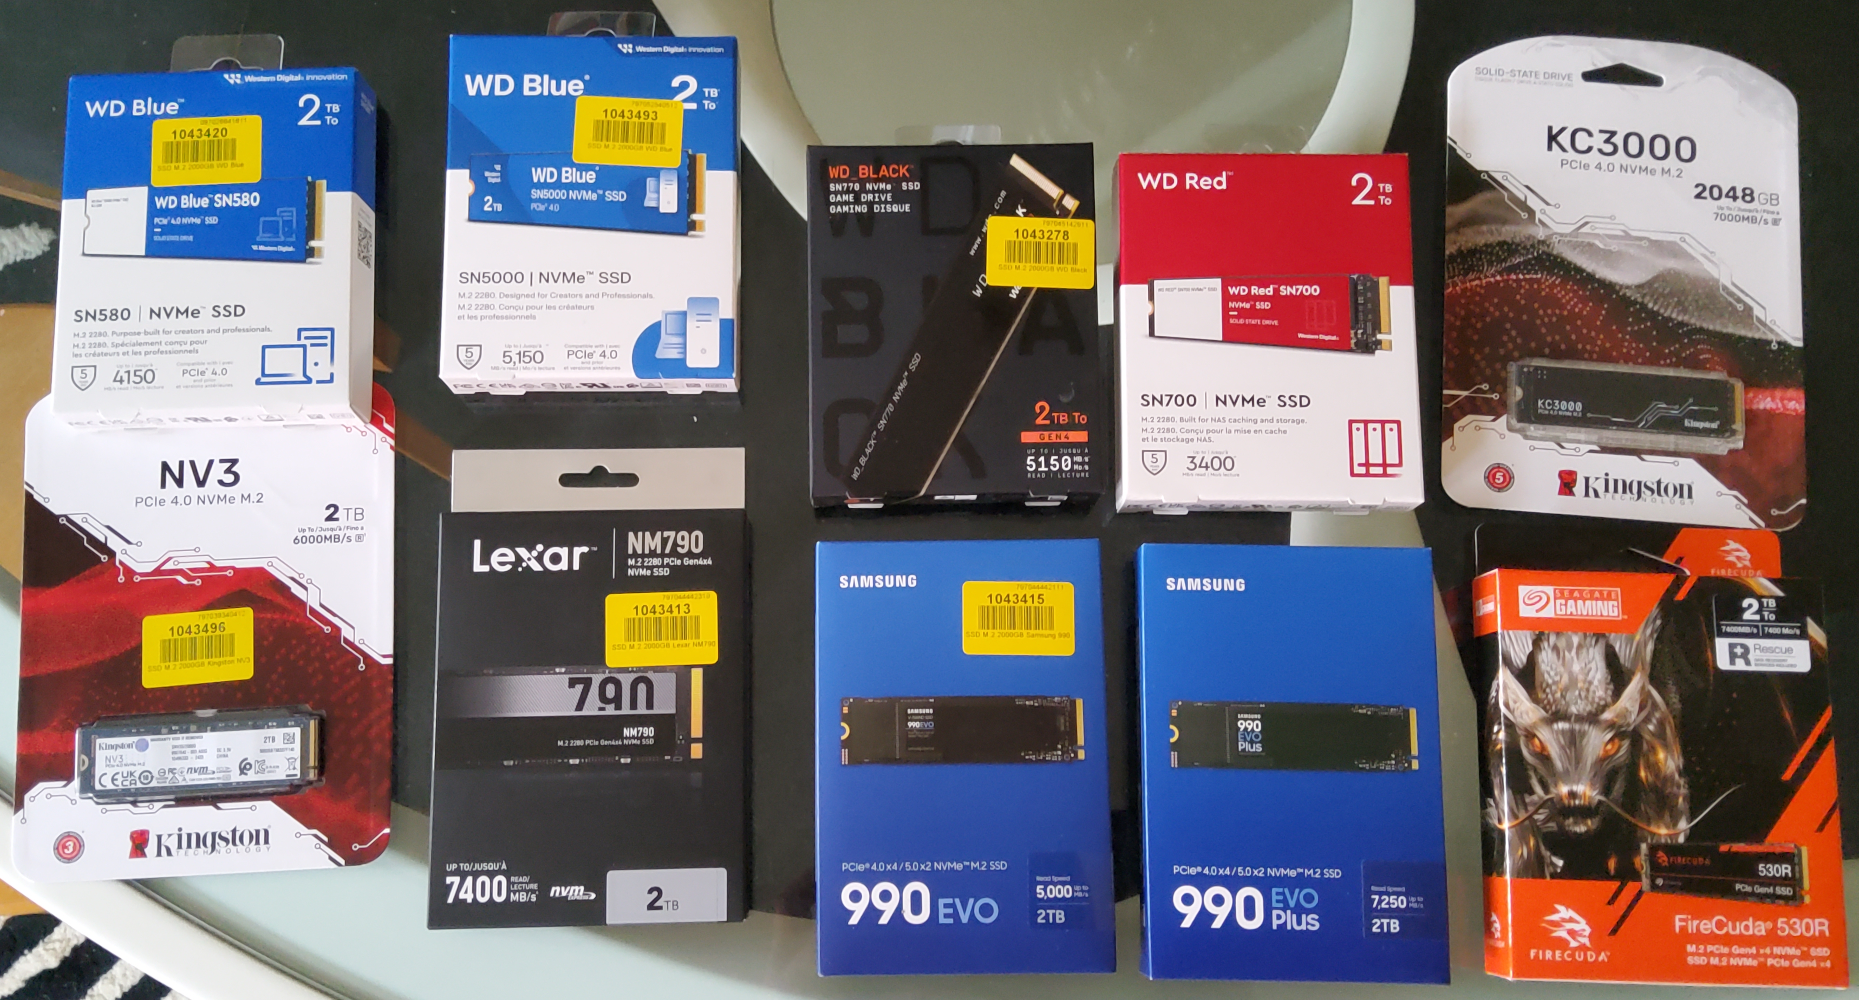
All bought NVMe are different models, this is intentional, when purchasing at the bottom of the price range I have to be realistic about life expectancy, especially when I use consumer NVMe for a Ceph cluster. The idea here is that yeah these will die at some point in time but I do not expect them to die within days of each other.
- 2000GB Western Digital WD Blue SN580 WDS200T3B0E - M.2 (PCIe® 4.0) SSD
- 2TB Kingston NV3 NVMe PCIe 4.0 SSD 2TB, M.2 2280 / M-Key / PCIe 4.0 x4
- 2000GB Lexar NM790 LNM790X002T-RNNNG SSD
- 2000GB Western Digital Black SN770 WDS200T3X0E - M.2 (PCIe® 4.0) SSD
- 2000GB Western Digital WD Blue SN5000 WDS200T4B0E - M.2 (PCIe® 4.0) SSD
- 2TB Samsung 990 EVO PCIe 5.0 M.2 NVMe™ SSD
- Kingston KC3000 M.2 2280 TLC NVMe
- Samsung 990 EVO Plus NVMe 2.0 SSD 2 TB M.2 2280 TLC
- WD Red SSD SN700 NVMe M.2 PCIe Gen3
- Seagate Firecuda 530R NVMe SSD 2 TB M.2 2280 PCIe 4.0
In a world with unlimited homelab budget, I would instead have equipped each node with
- one U.2 of 8 TB or more
- one M.2 of higher quality
- one PCIe 4.0 x8 card with 8 or more TB
but 5 nodes and 10 NVMe were already harsh enough on the homelab budget.
Cost so Far
| cost | description |
|---|---|
| 4'500 € | 5x Minisforum MS-01 Work Station 1TB/32GiB |
| 1'410 € | 10x cheap NVMe 2 TB |
| 80 € | 5x DAC 3m |
so just shy of 6k€, autsch, this better outperform my old Ceph cluster by a large margin.
Future Plans
This post is only about initial bringup. There might be additional post for these future tasks.
- fill all M.2 slots
- A friend (Danke critter) printed me 5 each of
- install Ceph Squid latest (today that’s 19.2.0) as per https://docs.ceph.com/en/squid/cephadm/install/#cephadm-deploying-new-cluster, on CentOS Stream 9, obviously use centos-release-ceph-squid, not …-reef and also ensure python3-jinja2 is installed.
- for the PCIe slot, a “SABRENT NVMe M.2 SSD to PCIe X16/X8/X4 Card with Aluminum Heat Sink” might be a good solution, mostly because a peer reported they are decent and the heatsink is screwed on (as opposed to the failing eventually rubber band faff that a lot of companies try to sell).
dnf search release-ceph
dnf install --assumeyes centos-release-ceph-squid
dnf install --assumeyes cephadm python3-jinja2