PiKVM V4 Mini for my four Ceph nodes
Table of Contents
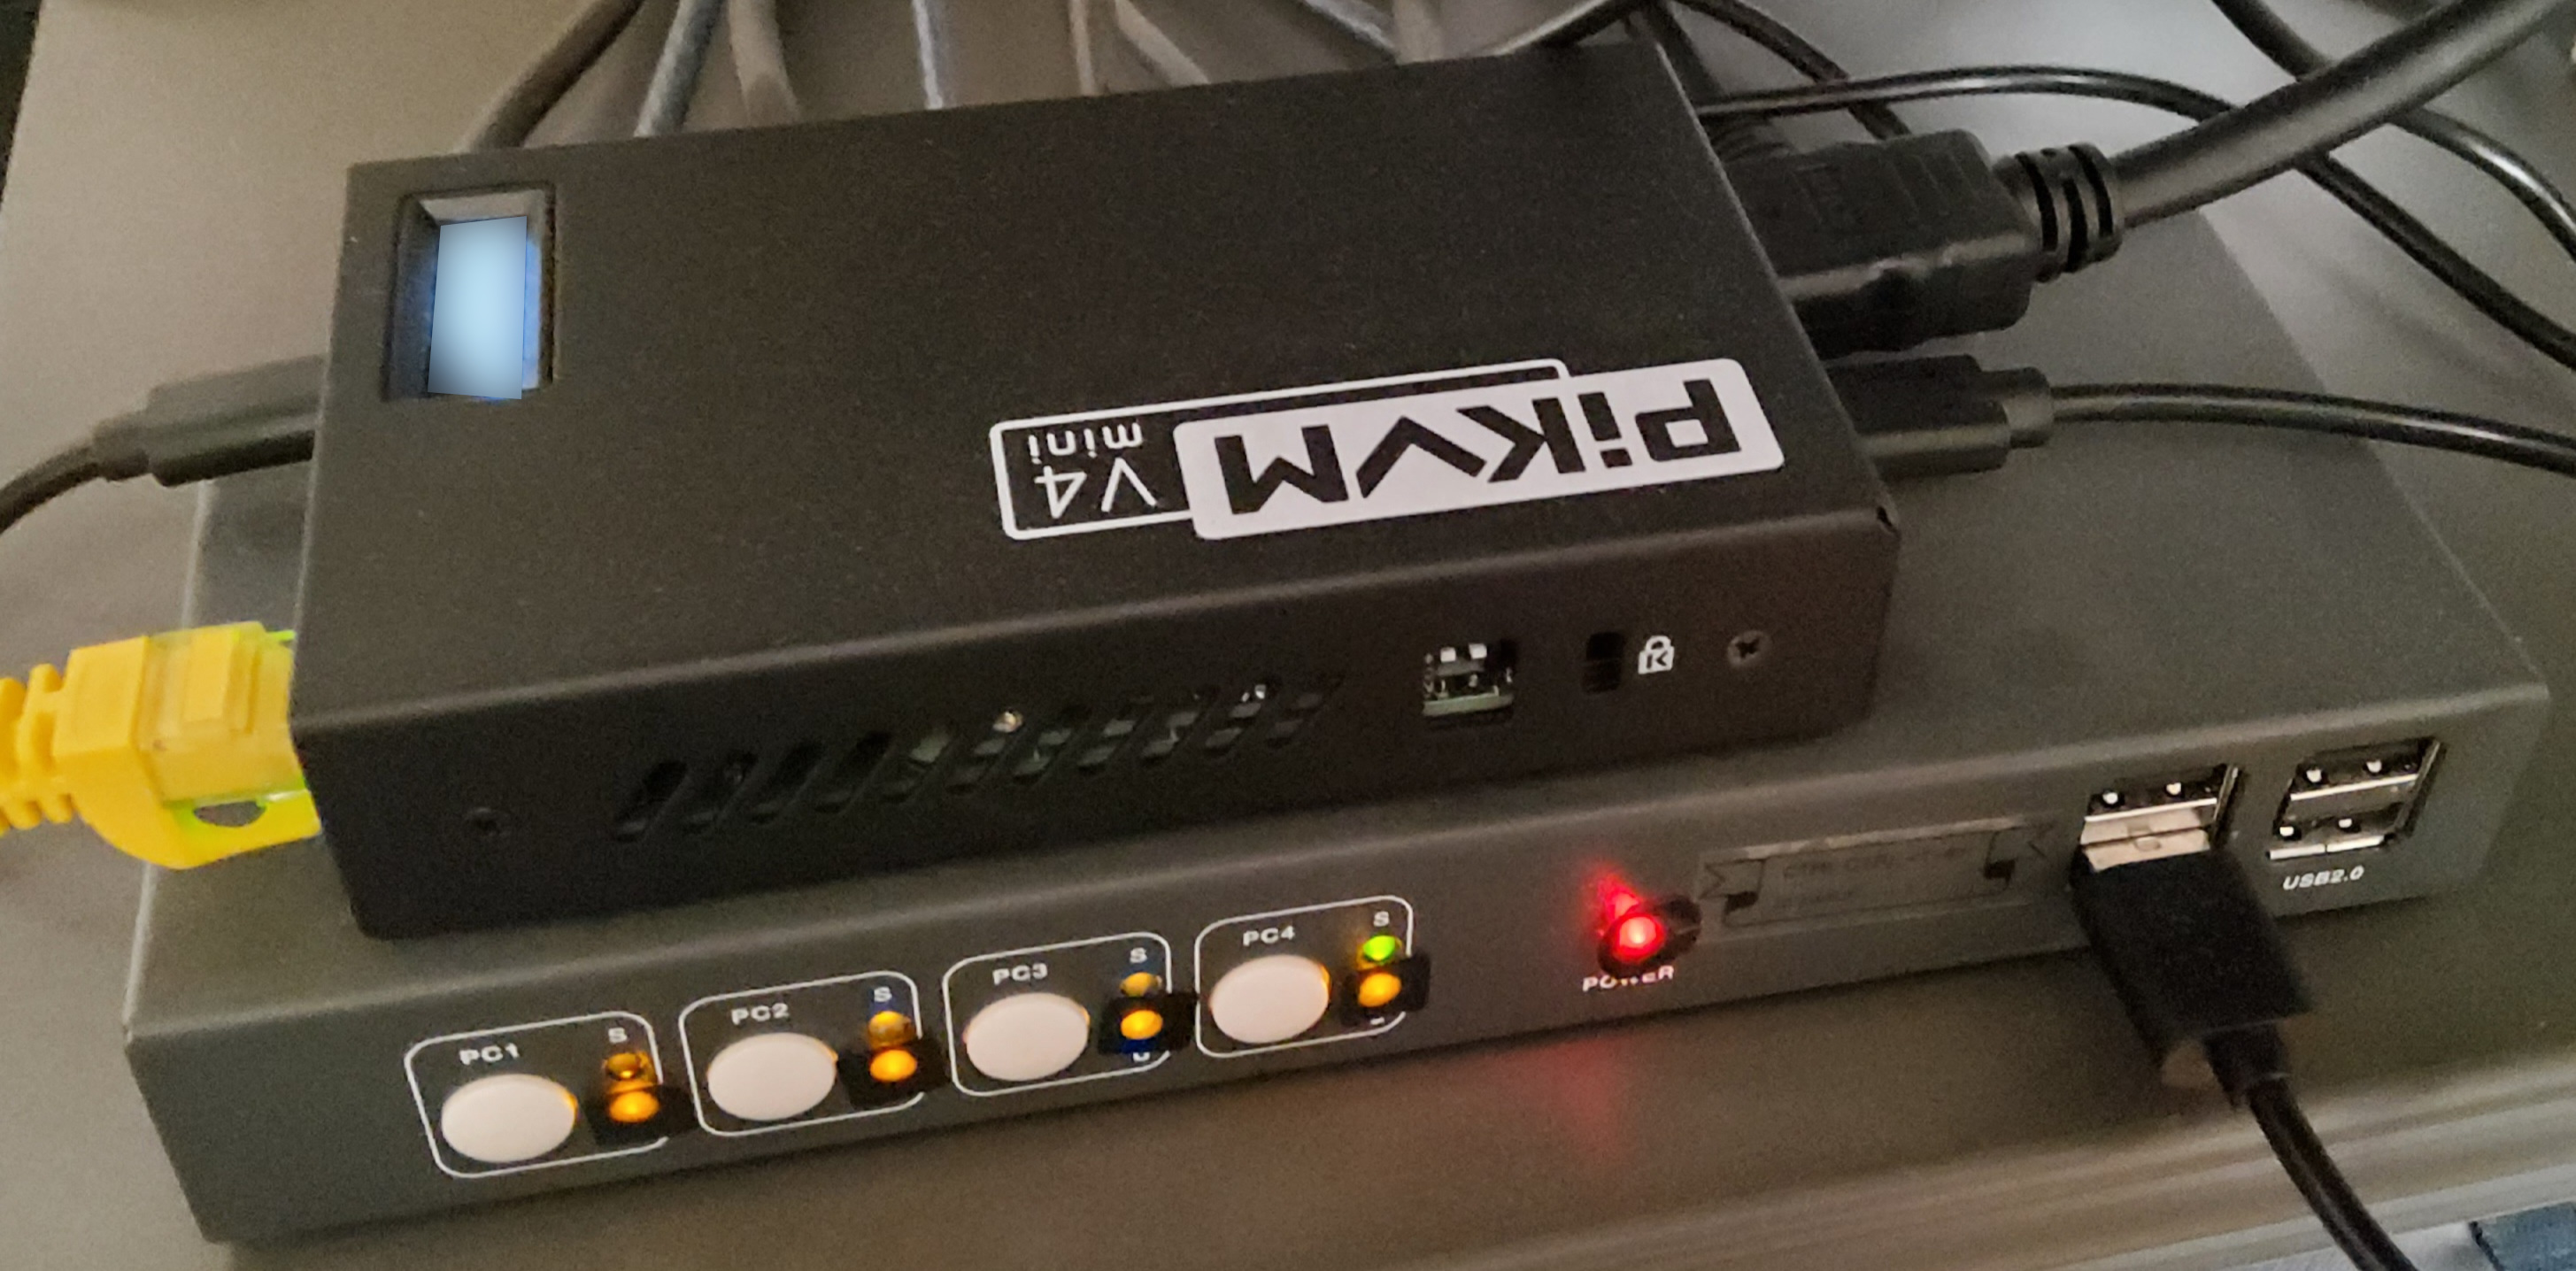
These are my configuration notes on using a PiKVM V4 Mini to connect to my four Ceph nodes via a cheap 4-port KVM switch.
Really, these are just setup specific notes for me. You should definitely read PiKVM’s documentation site first. It had all the information I needed, you should find what you need there too.
Summary
A well built, zero hassle device so far. Every well equipped homelab should contain at least one PiKVM V4.
It runs on Arch Linux. Which I hugely appreciate, Arch has an excellent Wiki and I prefer when a piece of kit uses a standard distro like Arch (instead of some cobbled together one-off that the vendor made but never updates in a timely fashion). Thank you, PiKVM team!
I am very happy that I backed them on Kickstarter and received my V4s (yes, plural, I got myself a Mini and a Plus) mid June 2023. Nice!
The only thing that was not so nice is that a lot of good information is under the PiKVM Handbook section FAQ, it would be nice if the FAQ entries were worked into the Handbook’s table of content e.g. if own SSL cert was found under Networking / Certificates or if I don’t need ATX functions. How do I disable this in the Web UI? was under Peripheral devices / ATX.
What follow is my braindump on how I set up my V4 Mini. If I find the time, then there will be a separate writeup that is less site specific.
DIP switches
Are explained in the section DIP switches of the PiKVM V4 Mini & Plus Guide.
For now I’ve left both DIP switched in their shipped position, OFF (up).
Wiring used
All but the HDMI cable came with my V4 Mini, nice!
What to wire where is both well documented and kinda obvious.
- 0.5m HDMI cable (from my cable heap) to an pre-existing cheap 4 port KVM switch (specifically this one from Amazon but I expect any switch that can change inputs via key combo to work)
- USB OTG with included USB cable to KVM switch’s lower K/M USB port
- network with included network cable to work room switch
- powered with included power brick
Wiring not used
Since this PiKVM is connected to my 4 Ceph nodes via a 4 port KVM switch, I had no need to wire up the ATX bits for this setup. But I am very glad the unit comes with these cablings as my other planned PiKVM use will include ATX (I have a second hand workstation that I repurposed as a hypervisor, a PiKVM fully wired will give me the full BMC functionality, incl redfish, I want for that box).
Since it is not wired up, I also disabled the ATX entry in webUI (FAQ entry I don’t need ATX functions. How do I disable this in the Web UI?)
Initial bringup
Completely painless and well documented.
- read IP off display once it booted up
- connected to that IP
- changed webUI password
- changed root password
- updated the PiKVM software (
rw && pacman -Syufollowed by areboot) - looked up the device’s MAC address in a shell (
ip -c a salso known asip -color address show) so I could adjust my dhcp server.
Site local config adjustments in infra config
Yes I can read the IP off the PiKVM’s display and/or I could set the device to static IP on the PiKVM, but it serves my use case better if on this network, this specific PiKVM always gets the same address via DHCP but if I ever take it to another network it still does DHCP and I can read the IP on the display.
- DHCP server now has static entry for this PiKVM
- DNS entries created
Site local adjustments on the PiKVM
- set a hostname with
rw && hostnamectl … && ro(c.f. FAQ if you wonder how) - added my local CA to system wide trusted ones with
rw && trust anchor --store pcfe-CA-2017.pem && ro(c.f. Arch Wiki) - created a certificate, put it on the PiKVM (as per the FAQ)
Switching 4-port KVM between the nodes
Because the cheap KVM I have in use can switch ports with ctrl-ctrl-1, ctrl-ctrl-2, etc, switching inputs is working out of the box with the PiKVM, as expected. Maybe I’ll dig around the docs a bit more to get 4 macros elegantly into the webUI, but I doubt I’ll sink much time into such webUI candy.
Practical use
BIOS setup
Works fine, I can navigate and make selection in the BIOS screen of my Ceph nodes. As expected.
Ceph use
Since my Ceph nodes run in text mode (multi-user.target), the PiKVM is used well below what it is capable of (1920x1200).
For my text mode needs the PiKVM plus the cheap 4-port KVM switch work superbly.
Yes, it is overkill for this use case, but I’d rather own a well engineered piece of kit like the PiKVM with a good enclosure that yet anothert nest of wires.
Now past an initial playing around, I only expects to use this specific setup actively if one of my 4 cheap Ceph nodes has problems I can not fix over a ssh connection. See my “state after 3 years” post to get an idea why now I feel I need to be able to easily access the consoles of my Ceph nodes, they clearly start showing their age.
Untested: USB storage
While my current Ceph nodes are seemingly not capable of PXE booting, I do drop all the needed bits in /boot to re-install a node. So I had no need to try if the PiKVM’s Mass Storage Drive functionality works through the switch. I guess that if it does not work when the PiKVM is wired to a K/M port of the KVM switch, one would try one of the explicitly labeled USB2.0 ports and check that ctrl-ctrl-1, etc still work with the cheap switch. Since I never used USB storage through the switch, it seemed unfair to test it with the PiKVM ;-) No, no, I jest, TBH I could simply not be asked to test a feature (USB storage through the switch to one Ceph node of four) for which I have no use at the moment.